Posts

Getting PCBs Made in India for a very competitive price

Image
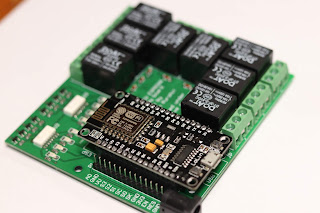
 It was 2017 when I first designed a PCB and wanted to make a prototype. I was searching for many manufacturers but none was there who will offer prototyping prices as cheaper as there are companies in China like JLCPCB, PCBWAY etc. With no option left, I had to order from JLCPCB and I am ordering from them for last three years for all of my projects. Their quality is really good, but each time you place order, back of your mind you know you are not supporting your country's manufacturing ecosystem.  How to overcome this?   I continued the search for Any competitive price alternative in India, till June 2020, there was really none. I know this might sound harsh to some of you but yes this was the fact. I had asked for quotations from as many as 15+ companies, but it was not beating what the Chinese companies are giving (for JLCPCB it was $2 for5 PCBs, initially 10 PCBs). Then there is only economical option of India post shipping. So overall price will go for around 10USD+ customs

DIY PVC gimbal head for long telephoto lenses

Image
This is another DIY stuff which I made just out of the parts available off the shelf. Please note all the steps might not be explained properly here, because it has been months since I made it and writing now as I remembered, what all I have done that time. Feel free to comment or contact on the mail if you want to make one for yourself. I will try to explain the doubts if you have. Also, make sure to comment and share if you like it. So it goes back in April 2018, when I bought my first DSLR, Canon EOS 200D with both the kit lenses. I wanted to buy a prime lens and skip the telephoto lens which comes bundled with a camera, but a friend came for rescue and removed this thought from my mind. Forever grateful to you Gaurav, for this. Many photos captured, with me realizing the importance of zoom lens especially for birding and Astrophotography. For birding, the struggle is real. You have to maintain distance and also get a good photo at least not the frame, which you can anyti

Credit Card Sized Pocket Intervalometer for DSLRs

Image
This is my first project to use Atmega328P standalone without any Arduino based boards. The advantages I found in doing so is the size of your project is considerably reduced, the thickness of the enclosure that you need to make or 3d print whatever is reduced. Most important is your project looks so neat and well made. What is Intervalometer An intervalometer is a remote trigger to your DSLR cameras, which makes it possible to click photos periodically with a given shutter speed and given delay. In simple words it tells camera when to take photo. With an intervalometer, you can push the camera to its best limits. Do I need one? Yes, you need one if you are interested in photography and like to do some creative stuff with your DSLR, rather than just taking photos and processing and publishing them. How to use an intervalometer?? Well, watch the video on how to use.  Pocket intervalometer Using the intervalometer, you can trigger the camera at the interval s

NodeMCU based 8 relay board for Internet of Things (IoT applications)

Image
What is NodeMCU?? Detailed information about this can be found at  https://nodemcu.readthedocs.io/en/master/. Basically it is an IoT board at very (!) cheap price.   Why to use relay boards The board can be used or IoT applications which involve switching devices as primary application. The relay board has the wifi on board so it will minimize the number of wires in your IoT project. Total 8 GPIOs are used for controlling 8 relays. The unused pins are soldered to male headers and kept open for other applications and connecting different sensors. The basic pin diagram of NodeMCU can be found at [NodeMCU documentation]--- https://nodemcu.readthedocs.io/en/master/ NodeMCU can be programmed using Arduino as well . Download Arduino IDE first. Connect NodeMCU using the micro usb cable. Install drivers for CH340G or CP2102 (depending on the controller on your NodeMCU). In the boards manager (Arduino IDE) use this URL. http://arduino.esp8266.com/stable/package_esp8266

AstroEQ based open source telescope controller board

Image
This is the second blog post about some DIY hardware I have made for controlling the telescope on equatorial mount based on AstroEQ platform, fully open source hardware. for more info about AstroEQ--- https://www.astroeq.co.uk/tutorials.php See what is an equatorial mount -- https://en.wikipedia.org/wiki/Equatorial_mount The board is fully an open source hardware based on ASCOM, EQMOD and AstroEQ, driven by powerful 8-bit microcontroller Atmega2560 (incorporated in Arduino boards). The board acts as shield for the Mega2560 boards available in the market and is capable of converting any equatorial mount telescope into a motorized telescope with both axis control and it will let you do through the PC or laptop... yay.. sounds interesting. Let us see what is required to do so..... First of all you need a telescope mount which supports mounting motors on that (either single axis or double axis). Once you have telescope mount, you have to do some basic calculations for

4 relay Bluetooth shield for Arduino Uno and Mega2560 based boards

Image
Why to use shield when you can customize with wires Exactly, because of the last word in the point made above. WIRES , they are the ones which make your project or instrument look very old fashioned and ugly. This is the reason why people prefer PCBs over breadboard. The shield which you have got takes care of that and ensures you have a smaller number of wires (Coming only from the sensors) in your project. Connection guide The relays operate through a phototransistor of Toshiba optocoupler, connected to the digital pins of the Arduino board. The optocoupler isolates from any short circuit happening on the output load which is to be connected. The Bluetooth is standard HC-05 Bluetooth module (Supplied with the board if opted). The overall design of the board is user friendly in the sense, user can change the Bluetooth modules if it goes bad by any chance. Bluetooth communication is a serial communication and can be programmed via Arduino IDE available for